Sunday, August 22, 2010
at
10:02 AM
Posted by
RyanGuan
Snapshots serve as a mechanism that allows us to revert virtual machines back to a previous state in a timely manner. A common issue when dealing with virtual machines and taking multiple snapshots occurs when the virtual machine will no longer stay running. In these scenarios, the VM will typically pause itself and reported to be in a “Paused-Critical” state.
This issue is caused by a lack of system resources available to the host. More specifically, this occurs when there is not enough free hard disk space available on the host drive where the virtual machine snapshots are stored. So how does this happen? Well, an AVHD file is created every time you create a snapshot of the VM. The problem is that these files are often quite large and can add up on you before you know it. Also, deleting the snapshots from Hyper-V manager will remove the link to them but won’t delete the AVHD files off of the physical disk.
Your initial reaction when winding up in a Paused-Critical state might be to delete the AVHD files to free up space; however, this won’t fix the problem in itself. You will then have to turn off the VM and delete the snapshot files from within Hyper-V manager for the free space to be made available to the VM. Microsoft recommends doing this process first prior to deleting the AVHD files manually. Alternatively you can export the VM and the import it back into Hyper-V manager.
Scenario
I shut down the VM and the merging process began. However, I had created a few snapshots in the past that still hadn’t been merged. It looked like the merging process might take a while, so I let it run. However, the merging process could not complete because I didn’t have enough disk space! I found this quite ironic.
I am of disk space because I did not merge the snapshots into the vhd, but I cannot merge the snapshots because I am out of disk space. Does that seem odd to anyone else?
In order to fix this problem I had to dive into the config file. Luckily, I had another hard drive with around 30GB of freespace attached to the host. To fix the problem I shut down the VM and Hyper-V Services then went to the directory containing .avhd (snapshot) files. I moved one of the snapshot files to a temporary directory on the drive with the free space, then updated the snapshot entry in the config xml file for the VM to point to the new directory where I placed the snapshot file. After restarting the Hyper-V services and turning off the VM the merge was able to complete, albeit after 2 hours of waiting.
I realize that Hyper-V is a somewhat new contender in the Virtualization marketplace, but I think that something is completely out of whack with the way that snapshots work. When you have systems that are required to be up and running 24/7 it basically throws away any use that snapshots have. It seems somewhat ridiculous that you have to bring a system down to delete the snapshot when one of the reasons you created the snapshot was to help reduce downtime in case something goes wrong. It is even more ridiculous that if you don’t power down your system and wait for the vhd to merge, the snapshot will continue to grow until the system comes crashing down due to a lack of disk space!
I understand that Microsoft does not recommend snapshots for production environments… but I hope in the future they make some improvements so that snapshots are usable in production environments.
Monday, July 12, 2010
at
11:49 AM
Posted by
RyanGuan
I just fixed this one. I had to create a registry entry in "\HKLM\SOFTWARE\Microsoft\Internet Explorer" with the version information. Make a new string value called "Version", and enter the version information, in my case I entered "7.0.5730.13". I don't think that it matters too much what version you enter as long as it is later that the 4.01 that is required.
Thursday, June 17, 2010
at
10:34 AM
Posted by
RyanGuan
When I tried to configure the adapter, the following error occurred: “The IP address <ip address> you have entered for this network adapter is already assigned to another adapter…”
So, in order to uninstall the old network adapter do the following:
- Click Start, point to All Programs, point to Accessories, and then click Command Prompt.
- At a command prompt, type the following command , and then press ENTER:
- set devmgr_show_nonpresent_devices=1
- Type the following command a command prompt, and then press ENTER:
- Troubleshoot the devices and drivers in Device Manager.NOTE: Click Show hidden devices on the View menu in Device Manager before you can see devices that are not connected to the computer.
- When you finish troubleshooting, close Device Manager.
- Type exit at the command prompt.Note that when you close the command prompt window, Window clears the devmgr_show_nonpresent_devices=1 variable that you set in step 2 and prevents ghosted devices from being displayed when you click Show hidden devices.
There is a
KB article about this. Although the article applies to Windows XP only, the solution worked very well on Windows Server 2003.
Friday, June 4, 2010
at
12:17 PM
Posted by
RyanGuan
An awesome website to test email addresses, the MX records and a test SMTP conversation for them is:
http://centralops.net/co/EmailDossier.aspx
Here is a screenshot of the type of information it produces:
at
12:01 PM
Posted by
RyanGuan
If you are looking to migrate to Exchange 2010 from 2003 or 2007, or prehaps perform a new Exchange 2010 installation there is a cool tool Microsoft has just released called Deploy Assist.
The Deployment Assist tool asks you a series of questions about your environment. Based on these questions it will then provide you with step by step instructions on how to perform the migration or fresh installation of exchange 2010. This is very handy as it tackles all kinds of network environments.
To use this tool go to the following link:
http://technet.microsoft.com/exdeploy2010
at
11:10 AM
Posted by
RyanGuan
To find out which domain controller your PC is talking to, use the following command:
nltest /dsgetdc:domainname.local or "set l" less informative but quicker and uses built in command
This is very handy when testing your active directory sites and services topology to ensure it is setup correctly. If you want to understand the process in which a client computer locates its domain controller
Monday, May 3, 2010
at
10:45 AM
Posted by
RyanGuan
High CPU usage due to hardware interrupts problem: Even with no program running, the CPU usage is 60% and the hard disk is going at full speed (indicating I/O?)
I have done all the standard scans for malware/Viruses and came up with no viruses and very little ad/spyware. I noticed high CPU usage at times when there was no program running.
I ran process explorer and found that the CPU usage due to hardware interrupt got up to about 80% and there are always at least 1,500 interrupts per scond (CSwitch Delta column). I believe this is excessive and I also believe it to be a hardware problem or possibly a driver issue.
This turns out ATA/IDE controllers will often revert back to PIO mode instead of Ultra-DMA. (According to MS KB article on the problem here.)
Solution:
Check the problem by examining the controller’s Primary and Secondary IDE settings: Device Manager -> IDE ATA/ATAPI controllers -> Primary or Secondary IDE Channel -> Properties -> Advanced Settings.
Look at the Current Transfer Mode field. If it’s “PIO” then you’ll need to uninstall the driver, reboot and let XP do its magic reinstall.
Download Process Explorer
Friday, April 23, 2010
at
9:37 AM
Posted by
RyanGuan
Accidentally deleted an important file? Lost something important when your computer crashed? No problem! Recuva recovers files deleted from your Windows computer, Recycle Bin, digital camera card, or MP3 player. And it's free!
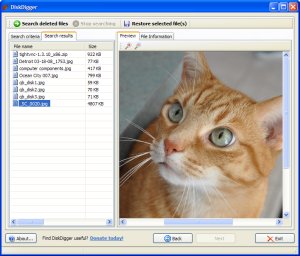
Restore that File or Photo using DiskDigger
If you don’t have any luck with Recuva, you can always try out DiskDigger, another excellent piece of software.
Note that DiskDigger doesn’t require installation, making it a really great tool to throw on your PC repair Flash drive.
Start off by choosing the drive you want to recover from…
Download Recuva from piriform.com
Download DiskDigger from dmitrybrant.com
Tuesday, April 6, 2010
at
3:18 PM
Posted by
RyanGuan
This guide describes important tuning parameters and settings that you can adjust to improve the performance of the Windows Server 2008 R2 operating system. This guide describes each setting and its potential effect to help you make an informed decision about its relevance to your system, workload, and performance goals.
This paper is for information technology (IT) professionals and system administrators who need to tune the performance of a server that is running Windows Server 2008 R2.
This information applies to the Windows Server 2008 R2 operating system.
Included in this white paper:
| • | Choosing and Tuning Server Hardware |
| • | Performance Tuning for the Networking Subsystem |
| • | Performance Tuning for the Storage Subsystem |
| • | Performance Tuning for Web Servers |
| • | Performance Tuning for File Servers |
| • | Performance Tuning for Active Directory Servers |
| • | Performance Tuning for Remote Desktop Session Host (formerly Terminal Server) |
| • | Performance Tuning for Remote Desktop Gateway |
| • | Performance Tuning for Virtualization Servers |
| • | Performance Tuning for File Server Workload (NetBench) |
| • | Performance Tuning for Network Workload (NTttcp) |
| • | Performance Tuning for Remote Desktop Services Knowledge Worker Workload |
| • | Performance Tuning for SAP Sales and Distribution Two-Tier Workload |
Performance Tuning Guidelines for Windows Server 2008
at
2:51 PM
Posted by
RyanGuan
Let’s look at what exclusion configuration should look like. On Hyper-V host you’ll find couple of core processes that’s crucial to host and VM performance.
Prevent following processes from AV scans by excluding following as part of Hyper-V AV policy:
VMMS.exe | VMWP.exe.
Also exclude root directories where VM configurations and Virtual Hard Disks are stored:
C:\ProgramData\Microsoft\Windows\Hyper-V
C:\Users\Public\Documents\Hyper-V\Virtual Hard Disks, Custom VM configuration, Virtual Hard Disk and Snapshot directories.
Next, create AV exclusions for following file extensions:
*.XML | *.VHD | *.AVHD | *.VFD | *. VSV | *.ISO. |*. BIN
- XML files
- These files contain the virtual machine configuration details. There is one of these for each virtual machine and each snapshot of a virtual machine. They are always named with the GUID used to internally identify the virtual machine or snapshot in question.
- .VHD files
- These are the virtual hard disk files for the virtual machine
- .AVHD files
- These are the differencing disk files used for virtual machine snapshots
- .BIN files
- This file contains the memory of a virtual machine or snapshot that is in a saved state.
- .VSV files
- This file contains the saved state from the devices associated with the virtual machine.
Finally, if you’re using Hyper-V R2’s Live Migration feature with CSVs, then you’ll need to exclude CSV path and any sub-directories. CSV path is as follows:
C:\Clusterstorage. Failure to create this exclusion on hosts using CSV, can only result in poor performance, but can also result in a missing or corrupt VM configuration.
Guidelines for Antivirus Exclusions
at
2:37 PM
Posted by
RyanGuan
The short answer is “Virtual machine snapshots are supported in production environments, but not recommended.” The longer answer is that there are a number of issues you should consider before deciding to use virtual machine snapshots in a production environment. The are as follows:
- Performance: as virtual machine snapshots use differencing disks, there is a performance overhead to be considered. This overhead is not too noticeable if you are already using dynamically expanding virtual hard disks, and you only plan to have a small number of snapshots around. If you are using fixed size virtual hard disks – then there will be a noticeable performance hit to using a virtual machine snapshot.
- Disk space: once again, because virtual machine snapshots use differencing disks, there is an added disk space usage involved with having a virtual machine snapshot. This is not too significant if you are using dynamically expanding virtual hard disks – but is more pronounced if using fixed size virtual hard disks (hint: do not use fixed size virtual hard disks and virtual machine snapshots together, it works but does not make a lot of sense as you lose most of the benefits of using fixed size virtual hard disks).
- Downtime: if you create a virtual machine snapshot and then delete it, you will have to turn the virtual machine off at some point in the future to let the snapshot AVHD file merge in.
- Clustering: unfortunately, if you use snapshots on a virtual machine that is part of a cluster, the snapshots will have incorrect network configurations after they have been moved from one node to another.
- Physical disks: if a virtual machine has a physical disk connected directly to it – you cannot use virtual machine snapshots.
So in summary: if you are using dynamically expanding virtual hard disks, have planned the location of your snapshot files, and can tolerate downtime at a later point in time to allow deleted snapshot files to merge – then go for it. Otherwise you may want to carefully consider the usage of virtual machine snapshots in production.
The reason that for people using virtual machine snapshots in production environments is that they want to have a safe point to return to before applying a patch / installing new software / making a configuration change. While it is a bit more work you can use VSS snapshots just as well for this sort of scenario – and you avoid the issues that I have outlined above.
Monday, April 5, 2010
at
2:51 PM
Posted by
RyanGuan
You may need to use the Inbox Repair Tool if you open your Outlook .pst file and receive this message:
"Unable to expand the folder. The set of folders could not be opened. Errors could have been detected in the file drive:\Documents and Settings\user\Local Settings\Application Data\Microsoft\Outlook\Outlook.pst. Quit all mail-enabled applications, and then use the Inbox Repair Tool. "
Included in all versions of Outlook is Scan.pst, a tool that may help in the event your .pst file becomes corrupted. Run scan.pst repeatedly until there are no errors.
To get at it, you'll need to navigate to this path using Windows Explorer:
For Outlook XP & 2003: Hard Drive Letter:\Program Files\Common Files\System\MSMAPI\LocaleID (which is 1033 for the USA or similar)
For Outlook 2007: Hard Drive Letter:\Program Files\Microsoft Office\OFFICE12. Now, inside this folder, you're looking for this particular setup file: "Scanpst.exe" When you run the .exe, you'll need to Browse... to your current .pst file and hit Start:

The Inbox Repair Tool will now scan the corrupted .PST file for errors:
If your PST file is recoverable, you'll see the repairable errors show up in the scan results. To fix them, select
Repair.:
Transferring Recovered PST File Data to New PST File
Once the repair finishes, Outlook creates a "Recovered" version of your .pst file, and you need to tell Outlook to use it rather than the old, damaged or corrupted .pst file.Next, you'll need to point Outlook in the right direction, namely at the recovered .PST file: Start Outlook Normally
Special Note: If Scanpst.exe wasn't able to repair the .pst data file, you may need a stronger repair tool. Try scanning it with the
Stellar Phoenix PST repair utility. Select
Go from the top menu, choose
Folder List:
With the Folder List open, you should see a Recovered Personal Folders folder with the usual Outlook Personal Folders, or a Lost and Found option.If the Lost and Found folder has a file that the Inbox Repair Tool successfully fixed, it will show up here.
If it's empty, the Repair Tool was unsuccessful.If you do see a fixed .pst file in the Lost and Found box, you'll need to create a new .pst file to move the repaired file(s) to. After you've simply dragged the files over from the "Recovered" .pst file to the newly created .pst file , you can turf the Recovered Personal Folders contents.
at
2:20 PM
Posted by
RyanGuan
Are you someone who likes to dig really deep into the hardware configuration of your computer? If so, HWiNFO32 is probably the best program ever for getting detailed system hardware information on the processor, hard drives, video cards, network cards, OS, and more.
HWiNFO32 – System Hardware Information
at
2:12 PM
Posted by
RyanGuan
Nice article with suggestions on how to keep your PC running smoothly. Topics include Disk Check, Removing Temp Files, Defragmentation and other suggestions on how and when to run built-in Windows tools. All OS’s.
Optimize your Windows computer
at
2:08 PM
Posted by
RyanGuan
Find your PCs open ports quickly with Roadkill’s tiny Scan Port scanner. Ports filtered by a firewall will easily be identified too.
Download Roadkill’s Scan Port v1.3
Wednesday, March 31, 2010
at
2:37 PM
Posted by
RyanGuan
Windows Remote Desktop uses default port 3389 to send and receive data. So the first computer being accessed remotely will be assigned this port to use for Remote Desktop. While the other computers in the local area network will be assigned sequential numbers starting with 3390. So, the second computer would be given port 3390, the third would use port 3391 and so on.
For each computer you want to remotely connect to you have to configure each computer to listen to different ports to avoid port conflicts by changing the registry key in
HKEY_LOCAL_MACHINE\System\CurrentControlSet\Control\TerminalServer\WinStations\RDP-Tcp\PortNumber
Port Numbers are in Decimal format
Note: To avoid conflict with other programs it is suggested to select a port between 49152 and 65535.
Now take that number you've chosen your computer to listen to and configure your router to port forward to that number. PortForward.com explain how to do this. Depending on your router the procedure is slightly different, however there are great tutorials on portforward.com to explain this.
To connect to that computer your format will now be ISPIPAddress:PortNumber (ex. 222.222.2.8:1234) to connect to that specific computer behind the router
Important: If you have a firewall software running, that too has to be configured to allow communication to the port you opened in your router as well.
Sunday, March 28, 2010
at
3:36 PM
Posted by
RyanGuan
Today we're going to run down, step-by-step, how to crack a Wi-Fi network with WEP security turned on. But first, a word: Knowledge is power, but power doesn't mean you should be a jerk, or do anything illegal. Knowing how to pick a lock doesn't make you a thief. Consider this post educational, or a proof-of-concept intellectual exercise.
Dozens of tutorials on how to crack WEP are already all over the internet using this method. Seriously—Google it. This ain't what you'd call "news." But what is surprising is that someone like me, with minimal networking experience, can get this done with free software and a cheap Wi-Fi adapter. Here's how it goes.
at
12:18 PM
Posted by
RyanGuan
There are many ways to download YouTube videos. This guide talks about two such ways, one for Firefox users and other for those who would prefer using an offline tool to do it.
Download 1-Click YouTube Video
Friday, March 26, 2010
at
10:37 AM
Posted by
RyanGuan
It has all the features of the built-in Windows Manager plus a few additional functions that can be helpful if you have to troubleshoot device driver problems. Here is a list of the most important features of Device Remover:
- In-depth information about devices and drivers
- Print device tree
- Displays hidden, non-present, and problem devices
- Searches device drivers
- Bulk removal of device drivers
- Backup device drivers
- Open and export device driver registry entry
- Start/stop, enable/disable device
- Update driver
- Save detailed driver information
Download Device Remover
at
10:32 AM
Posted by
RyanGuan
Karen's LAN Monitor is a freeware tool that displays all kinds of network related information. The tool comes with eight tabs: Adapters, Phonebook Entries, Connections, Traffic, IP Stats, TCP Stats, UDP Stats, and ICMP Stats.

 Download Karen’s LAN Monitor
at
10:15 AM
Posted by
RyanGuan
If you are looking for something that can help you to migrate your DHCP reservations to the new Server (Windows Server 2008 R2), then DHCP Reservation Manager does exactly what you needed, automatically migrate DHCP reservations. You can read about its features here. The tool offers four options:
- Migrate reservations from one DHCP server to another
- Synchronize reservations between two DHCP servers
- Dump leases
- Read reservations from a text file
The blog entry at
blogs.technet.com is quite comprehensive.
Friday, March 19, 2010
at
11:36 PM
Posted by
RyanGuan
Upgrading or replacing your existing Microsoft® Windows® - based server hardware? Consolidating your existing Microsoft® Windows® servers to a Virtual Environment? No need to deploy from scratch - simply migrate using HP Insight Server Migration software for ProLiant.
This convenient software provides an automated, accurate, and affordable way to migrate your existing servers and virtual machines.
The HP Insight Server Migration software for ProLiant (SMP) simplifies the server consolidation process. HP Insight Server Migration software for ProLiant migrations involve migrating an operating system, applications, and data from one server to another, instead of manually redeploying these elements on a new server. SMP provides the following migration capabilities:
1. Physical-to-ProLiant (P2P) migration — Migrates a physical machine to a ProLiant server
2. Physical-to-virtual (P2V) migration — Migrates a physical machine to a VMware, Microsoft, or Citrix virtual machine guest
3. Virtual-to-ProLiant (V2P) migration — Migrates a VMware, Microsoft, or Citrix virtual machine guest to a ProLiant server
4. Virtual-to-Virtual (V2V) migration — Migrates a virtual machine guest between different virtualization layers, such as migrating a Microsoft Virtual Server VM guest to a VMware ESX VM guest
Thursday, March 11, 2010
at
3:52 PM
Posted by
RyanGuan
When executing the following command to Start> Run>
ipconfig /renew
The below error message displays on your screen:
An error occurred while renewing interface Local Area Connection: the requested service provider could not be loaded or initialized.
An error occurred while renewing interface 'Internet': An operation was attempted on something that is not a socket.
The operation failed since no adapter is in the state permissible for this operation.
Solution:
Go to menu start and select Run.
Copy/paste the following command:
netsh winsock reset catalog
Saturday, February 20, 2010
at
2:24 PM
Posted by
RyanGuan
Bookmarks is an easy way of remembering website we visit often. There are chances that Firefox may crash because of a new add-on installation, theme installation or any other reasons. It is always good to have a back up of data especially the bookmarks in Firefox. Taking a back up of bookmarks is pretty simple process and basically there are two methods to back up your Firefox bookmarks;
Method-1:
Go to Bookmarks->Organize Bookmarks in the main menu.
This will open up the Bookmarks Manager window. In this window you can see all the bookmarks saved. Go to
File->
Export and save the file in the preferred location. The file will contain all your bookmarks and will be an .
html file. Whenever you
install Firefox in another PC or re-install in your PC, you can import all the bookmarks through
File->
Import and select the option
From File in the Bookmarks Manager.
Method-2:
Second method is directly taking a back up of the bookmarks.html file from the profile folder of the Firefox application. To do this navigate to this folder-
C:\Documents and Settings\<your profile name>\Application Data\Mozilla\Firefox\Profiles\ati9z0wb.default
In this folder you can find a HTML file by name bookmarks.html. Take a copy of this file and paste it in the desired location. Thats it, next time if you install Firefox, import this file using the steps mentioned above.
Update: The folder
ati9z0wb.default may be different for different profile
Wednesday, February 10, 2010
at
10:46 PM
Posted by
RyanGuan
What is SkyDrive Explorer?
SkyDrive Explorer is a
free, easy-to-use, but very powerful extension for Windows Explorer. With
SkyDrive Explorer you can make any every-day operations with your documents from
Microsoft Live SkyDrive™ service (
read more...) using Windows Explorer, as if they were on your computer.
Moreover you don't need to install and configure any additional programs or ActiveX components.
SkyDrive Explorer will organize the interaction with the online storage itself.
Installation Guide
Download SkyDrive Explorer
at
9:55 PM
Posted by
RyanGuan
Microsoft has a free application named
Disk2vhd, which can create a virtual hard drive (VHD) of your existing operating system. A couple of cool things you should know about Disk2VHD:
* It can convert the chosen hard drive into a VHD file, even if it is in use.
* It's portable – no installation is required
Why would you do this?
* Working on another machine - This could come in handy in a couple of situations, such as if you are going to be working on another system, but you still want access to your PC. Just take the VHD with you on a portable drive or flash drive.
Steps to Create the VHD
Here are the steps to create the virtual machine of the existing Windows OS on your physical computer:
1. Download the Zip file and extract to a local drive, portable or flash drive. The just double-click Disktovhd. exe.
2. Disk2VHD will show you the available drives in your computer.
3. Select the drive you want to migrate as a virtual machine. If your OS and apps are installed on C:, select that drive from the interface.
4. Specify the path where you want to save the VHD file. As you can see, the drive is going to be pretty large.
5. Click the Create button. It will take a few minutes to create the vhd file, so you'll have some time to get a cup of coffee whilst it runs.
The software will clone a virtual hard disk of the drive selected and save it in specified location. After the vhd file has been created, you can use any virtualization software to mount the virtual hard disk and run the operating system as a virtual machine.
Download Disk2VHD
Saturday, February 6, 2010
at
7:17 PM
Posted by
RyanGuan
When joining users to the domain. Copying their current profiles to new profiles, this will takes a very long time.
There's a way to CHANGE their current local login profile, (without creating a copy as that will take up lots of space and time,) to a domain profile
1. Log onto system.
2. Go to start/run/regedt32
3. Locate key - HKEY_LOCAL_MACHINE\SOFTWARE\Microsoft\Windows NT\CurrentVersion\ProfileList
4. This will show all readable profiles on the machine, it may but probably will not show information leading to the users original profile.
5. Navigate to C:\Documents and Settings\UsersName and note the profile name of the original profile, usually the same minus the domain information. Make a note of it.
6. Now go back to regedit and manually edit the duplicate profile location in the ProfileImagePath key to that of the original e.g:
Original - %SystemDrive%\Documents and Settings\jsmith
Duplicate - %SystemDrive%\Documents and Settings\jsmith.domain
Change the duplicate to point to the original profile, save the change.
7. Now have the user log back in, and they should now again be operating on their original profile
Friday, February 5, 2010
at
5:43 PM
Posted by
RyanGuan
- I checked the "My Computer" window, and F: drive was assigned to my primary hard drive. C: and E: drives had been assigned to my the 2 slots in my 7-in-1 card reader as "Removable Disk(s)", and my CD drive was designated as D: drive.
-
- So how do I change the drive letter names within Windows XP so that C: represents my primary hard drive? I can manually change the current drive letters set for the 7-in-1 card reader using the XP Disk Management snap-in, but when I try to change my hard drve's letter, I receive an error message that says "Windows cannot modify the drive letter of your system volume or boot volume."
-
- Solution:
- 1. Start regedit
- 2. Go to the following registry key: HKEY_LOCAL_MACHINE\SYSTEM\MountedDevices
- 3. Find the drive letter you want to change to (new). Look for "\DosDevices\C:".
- 4. Right-click \DosDevices\C:, and then click Rename.
- 5. Rename it to an unused drive letter "\DosDevices\Z:". This frees up drive letter C.
- 6. Find the drive letter you want changed. Look for "\DosDevices\F:".
- 7. Right-click \DosDevices\F:, and then click Rename.
- 8. Rename it to the appropriate (new) drive letter "\DosDevices\C:".
- 9. Click the value for \DosDevices\Z:, click Rename, and then name it back to "\DosDevices\F:".
- 10. Restart the computer.
-
- Here is a link to a Microsoft Knowledge Base article that provides the instructions.
http://support.microsoft.com/default.aspx?scid=kb;en-us;223188
at
3:17 PM
Posted by
RyanGuan
you probably have 802.11n authentication checked and make sure that the box
next to "Enable IEEE 802.11x ..." is NOT checked.
1. On the PC, in Control Panel | Network Connections, right-click on the Local Area Connection and choose Properties.
2. In Local Area Connection Properties, go to the Authentication tab.
3. In the Authentication tab, uncheck Enable IEEE 802.1x authentication for this network.
Thursday, February 4, 2010
at
10:22 PM
Posted by
RyanGuan
I'm not able to login to Windows. As soon as login, the windows show applying settings, saving settings and logs off automatically without logging in.This situation is really very troublesome.
The main reasons behind this problem is a corruption in the registry key which holds the value of the files which are executed while login to windows. This registry key can get either replaced with some incorrect value or it might get corrupt due to some virus / trojan activity. Lets see how to fix this issue.
Solution:
Fix with BartPE
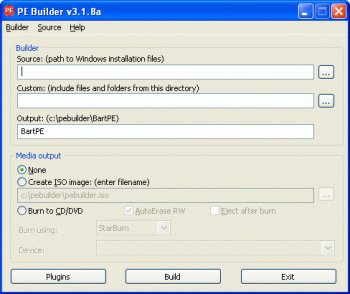
Bart Lagerweij's
PE Builder is a utility that allows you to create your own bootable CD-ROM ("BartPE") by extracting the necessary files from your Windows XP installation CD. PE Builder lets you add other applications by using "plugins".
Another extremely useful feature of BartPE is the ability to create a boot CD-ROM that provides network access. Yes, you can even surf the Internet from such a CD-ROM. Watch our tutorial on
YouTube about creating a BartPE Boot CD-ROM.
You can use Bart PE to check whether userinit.exe exists in C:/windows/system32. Then make sure check explorer.exe to be there in C:/windows. Then try to copy an userinit.exe / explorer.exe of your pc to this pc.
Open up the regedit tool from GO menu to check the registry. In the registry, locate this entry
HKEY_LOCAL_MACHINE\SOFTWARE\Microsoft\Windows NT\CurrentVersion\Winlogon\ and at this entry there is a key names userinit, double click on the key and set its value to
“C:\WINDOWS\System32\userinit.exe,“
I got it working by doing the following:
1) copying C:/Windows/system32/userinit.exe to C:/Windows/system32/userinitnew.exe
2) using tool from above to edit registry and set the winlogon value to point to userinitnew.exe
Exit the registry editor, restart the infected computer. This will work for most of the computers.
For those computers which still don’t let you login, you need to run a repair setup on such computers.To run a recovery setup,
see this link.
Download BartPE
at
5:05 PM
Posted by
RyanGuan
I recently came across this spyware from my customer pc.
"Warning! Visiting this site may harm your computer!" Screen is Dangerous
" This web site probably contains malicious software program, which can cause damage to your computer or perform operations without your permission. Your computer may be infected after visiting such web site.
We recommend you to install (or activate) antivirus security software. "
I have a choice to either “Continue Unprotected” or “Get security software”. When you choose get security software then it will be redirected to the purchase page of whichever rogue is being promoted.
Wednesday, February 3, 2010
at
4:35 PM
Posted by
RyanGuan
Looking for a super fast and easy way to download YouTube videos? 3outube.com might be your answer. While watching the video, simply replace the “http://www.y” part of the URL with the number “3”. Download link will appear and you have your video.
3outube.com
at
3:53 PM
Posted by
RyanGuan
1. To add an Exchange account to your iPhone, tap Settings, then Mail, Contacts, Calendars, then Add Account, then Microsoft Exchange. Note, you can configure only one Exchange account per device..
at
3:43 PM
Posted by
RyanGuan
This free tool helps you turn your Windows 7 laptop into a Wi-Fi hotspot and share your connection with others. Connectify is free to use but you have to register before downloading it.
Connectify
at
3:40 PM
Posted by
RyanGuan

Since a lot of you weren’t (and still aren’t) too excited about Windows Vista, you might not have noticed the exFAT file system before.
It’s the heir apparent to FAT32, and it can finally cope with large files and drives. What’s new? For starters, exFAT has been tweaked to provide faster access and allocation, adds support for UTC time stamps, and provides increased compatability with flash media.
Gone are the 32gb drive and 4gb file size limitations. The only problem is that exFAT isn’t native to Windows XP – which the vast majority of you are probably still running.
Problem solved. Microsoft has released
KB955704 to address the issue.
Download it from their site and install it, and you’ll be able to seamlessly work with exFAT partitions in XP.
at
3:26 PM
Posted by
RyanGuan
There are a lot of services these days that let you store files in “the cloud” and access them from virtually anywhere. These services are extremely handy, but what if you need a mobile operating system as well? Today we take a look at a couple of online operating systems that let you store your files and work on them as well.
Online operating systems are a good solution if you have say a Mac at home and PC at work. Or maybe certain features of Windows aren’t available on different machines you work on during the day. There are a lot of different scenarios where an online operating system could come in handy. Here we take a look at two such apps which have a lot of functionality and are free to use.
G.ho.st
This is a worthy free Web OS that gives you 15GB of storage and offers an office suite (powered by Zoho), sharing and collaboration, and access to your documents on a mobile device. The OS runs in a separate window of your browser and has a lot of neat functionality. Everything you do is saved and will be exactly the same no matter what computer you use to log into your account. The Go button acts like the Start menu on Windows and gives you access to all of the available apps and other utilities.

at
9:42 AM
Posted by
RyanGuan
If you have a netbook and would like to upgrade it to Windows 7, you may be wondering how to do it without a clunky external DVD Drive. Today we show you how to install Windows 7 from a USB flash drive.
Installing Windows 7 from a flash drive is essentially the same as installing it from a DVD.
Most of the work is setting up your flash drive so it becomes a bootable device with the OS on it. Here we will take a look at a couple of utilities that will allow you to easily create a bootable USB drive and copy Windows 7 to it.
Note: You’ll need a minimum of a 4GB flash drive to dedicate to the installation files.
Windows 7 USB/DVD Download Tool
If you have an ISO image of Windows 7, using Microsoft’s free utility is a quick and easy option to get the image on your USB flash drive. It requires XP SP2 or higher and if you’re using an XP machine you’ll need .NET Framework 2.0, and Microsoft Image Mastering API V2…both of which can be downloaded from the link below. It seemed to work best if I formatted the flash drive as NTFS before using the download tool. But that could be because of the flash drive I used…your mileage may vary.


